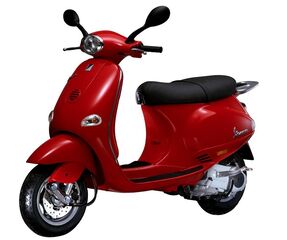
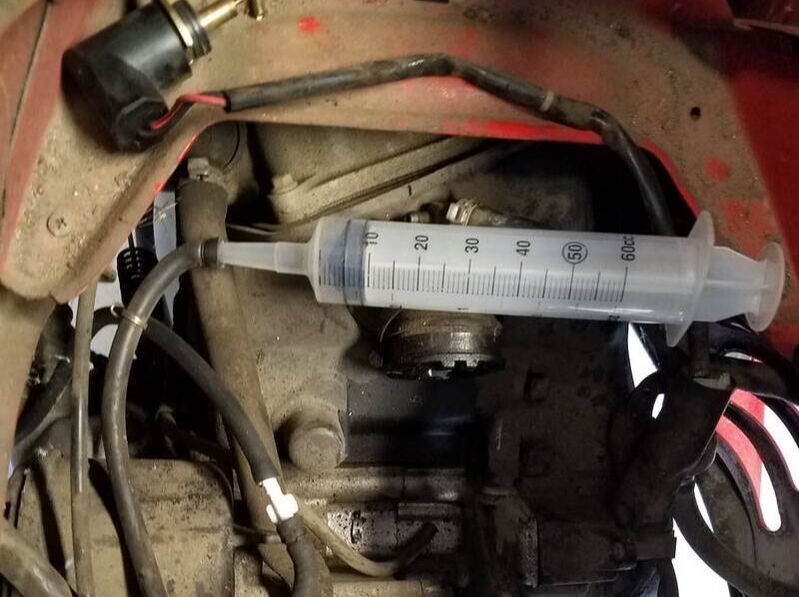
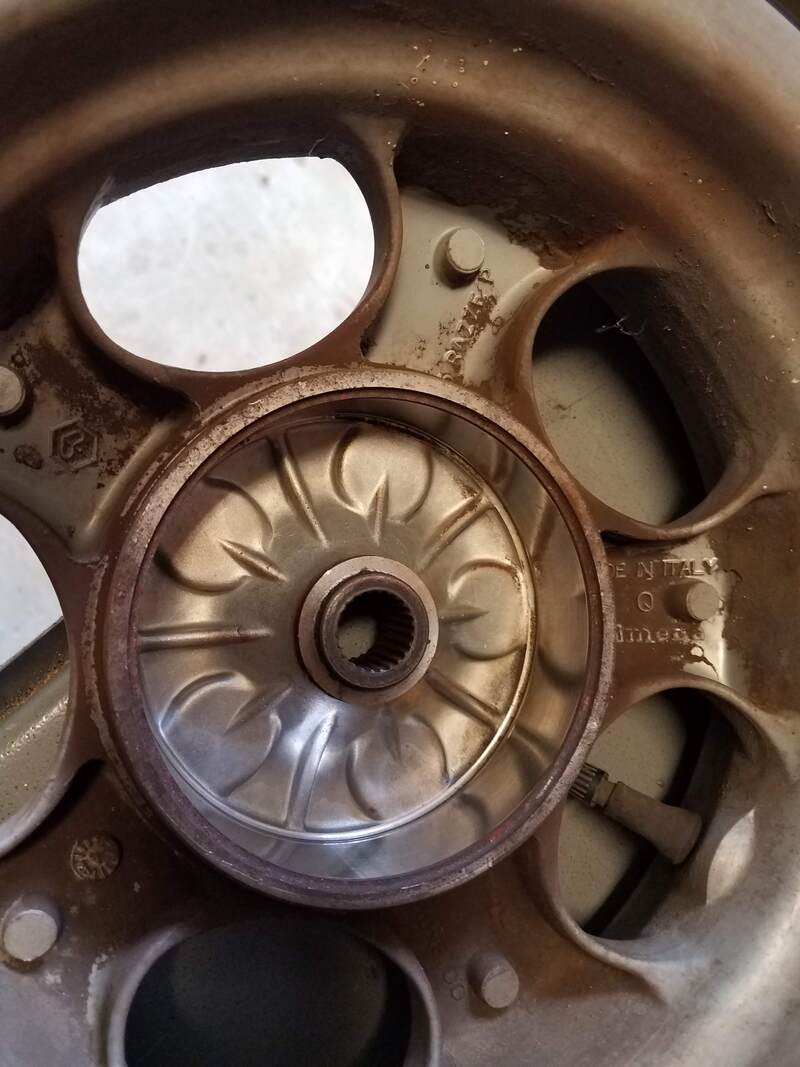
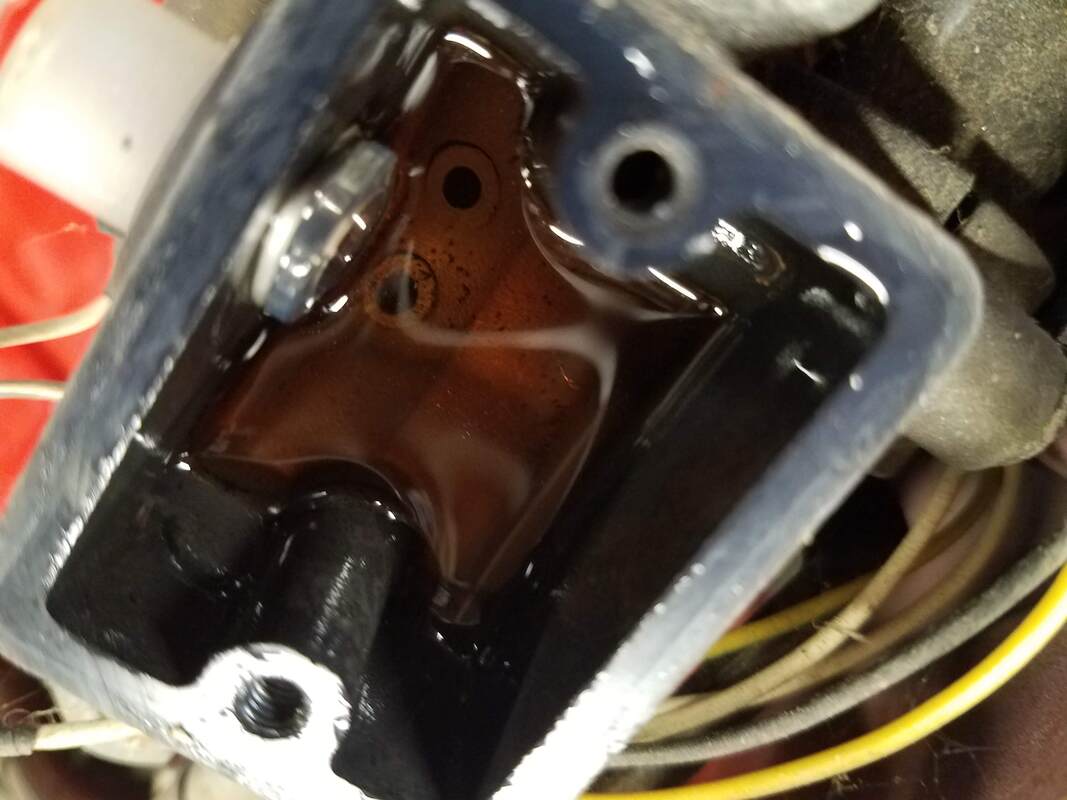
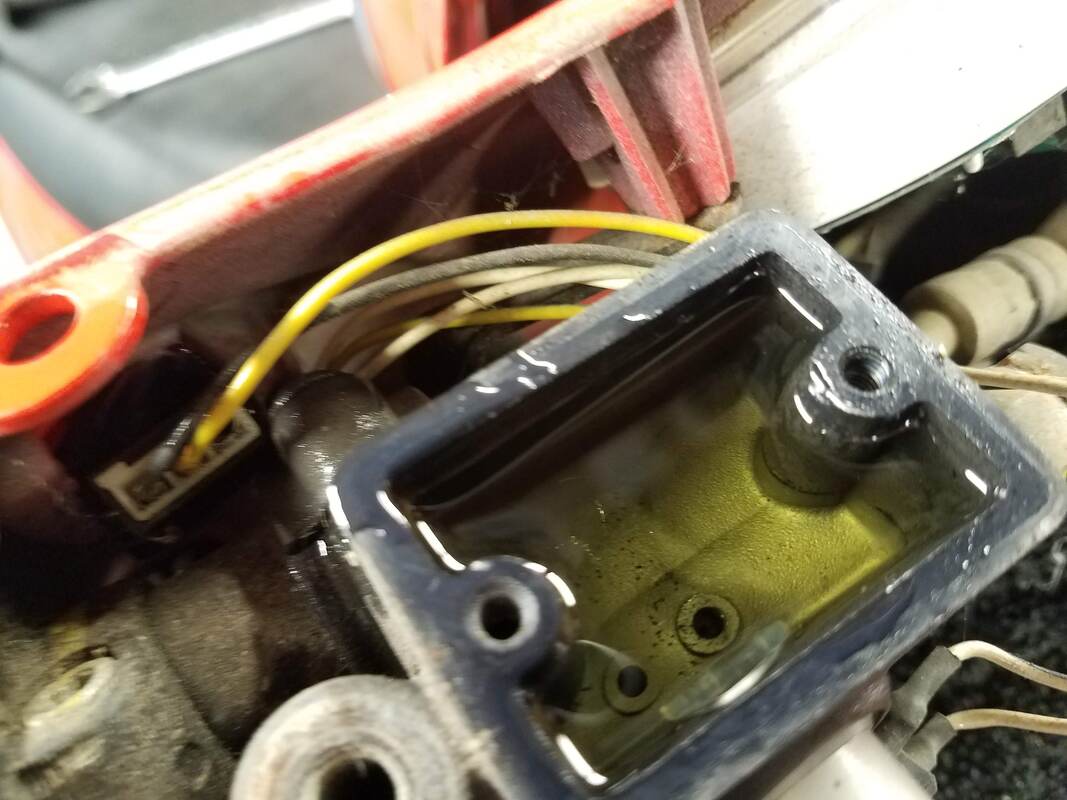
 OMG, she is so cute! She is a red Vespa GT4 / 150, a hot little Italian number who just wants to have fun. (Does that make me an Italian Lover?) Well, she wanted to have fun, but she was in a coma when she came in. Her battery was DOA, her tires were far too old to be ridden safely, she needed fresh oil in her engine and transmission, and obviously new brake fluid...but her carb. Oh dear. Her carb betrayed her. Like so many gasoline powered machines, she had been sitting in a garage for quite a while with ethanol-mix fuel in her tank, going nowhere. And while she sat, her carb got more and more filled with gunk (that's a technical term)...but worse, while she sat the carb was discontinued by the manufacturer. Worse still, all support (i.e. repair parts) for the carb were discontinued. What could have been a reasonably inexpensive clean / rebuild became a more expensive carb replacement job. The good news was that the same manufacturer had a substitute carb that fit perfectly and worked perfectly as soon as it was installed. 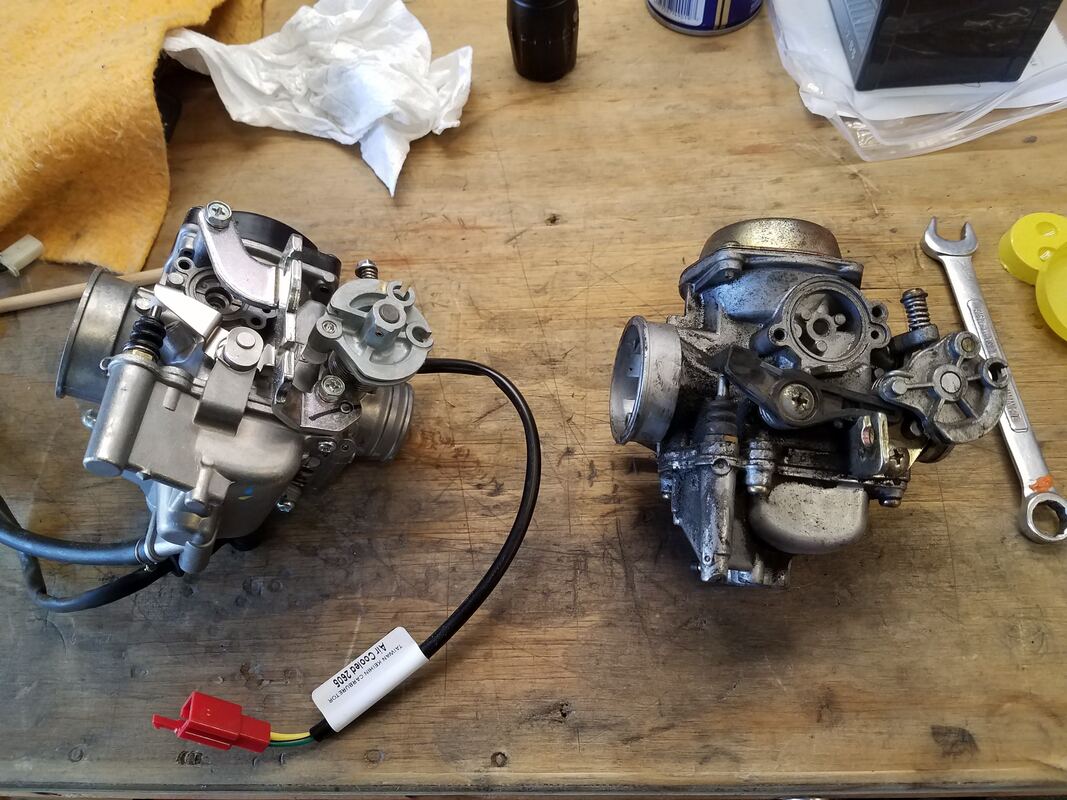 But how do you get all that bad gas out? Well, the fuel hose gets disconnected when you pull the carb, how about pointing it into a bucket and letting it flow? Not so fast, Lover Lips. The tank has a gallon of old gas in it and noting is coming out. What gives? Motorcycle fuel tanks on carbureted bikes have a petcock (a valve) between the tank and the carb. In many cases the petcock is bolted into the tank. In other cases, it hangs below the tank. In any case, the valve controls whether or not fuel flows from the tank into the carb float bowl. The carb has a float valve that is supposed to allow fuel into the carb when the fuel level in the bowl gets low...and stop fuel coming in when the bowl is full enough. You see float bowls in the photos above. They are the bowl shaped pieces bolted to the bottom of the carbs. But the float valve is just a weak and tiny thing and bike manufacturers tend not to trust the valve to prevent every little drip from getting through. You can imagine if it sits for a week, letting just one drop of fuel get in every hour, it is not long before you have a flooded engine. Not good. So the float valve is backed up with an upstream petcock (an upstream fuel valve). Many bikes have a manual petcock. You may have noticed a motorcycle rider walking up to his bike, reaching under the fuel tank for some odd reason, and then turning the key and firing up the bike. That rider was opening the petcock. However, some bike have an automatic petcock. In very rare cases it may be electric on a carbureted bike. In most cases, if automatic, it is vacuum operated. When the engine turns over, the cylinder sucks air in through the carb...and when it does, it creates a little low pressure area (a little vacuum) right at the carb inlet. And that is where a tube is attached that carries that vacuum to the flexible diaphragm in the petcock, that gets sucked back under vacuum, and pulls the fuel valve open, allowing fuel to flow. So...sitting on the lift not running, this little Vespa would not allow any fuel to flow from the tank, into the fuel line that connected to the carb. No vacuum, no fuel flow, no draining the tank. Hmmm. What we need here is something that sucks.
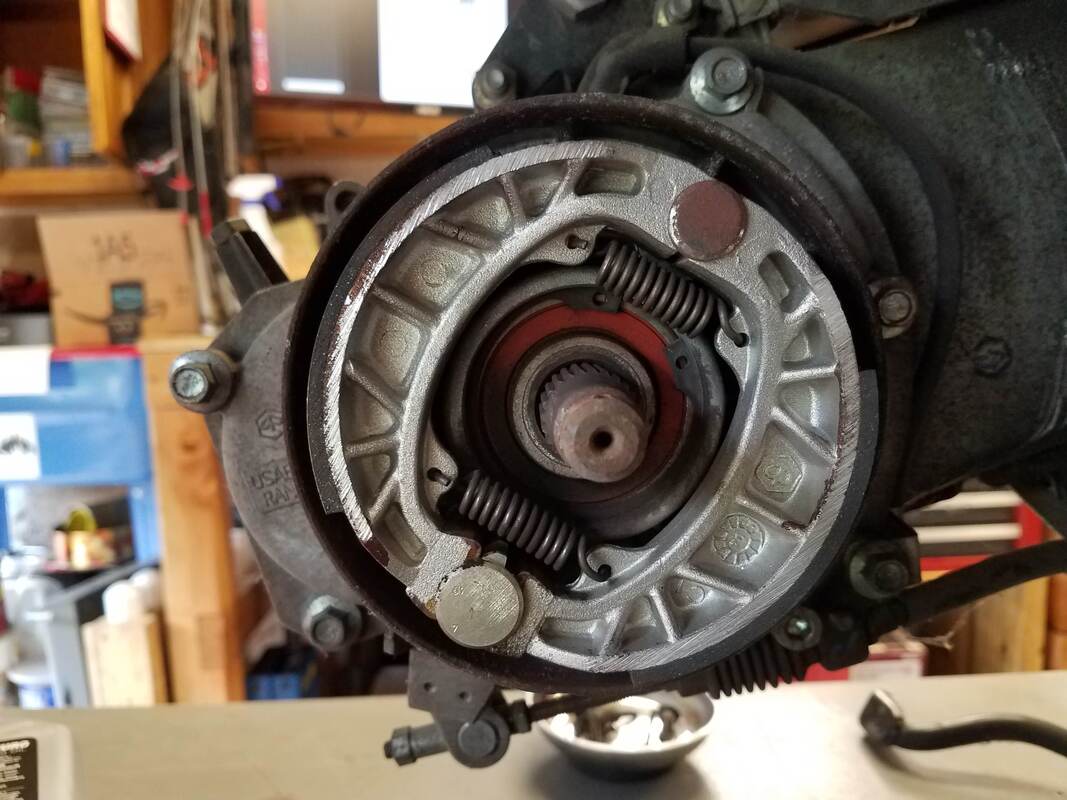
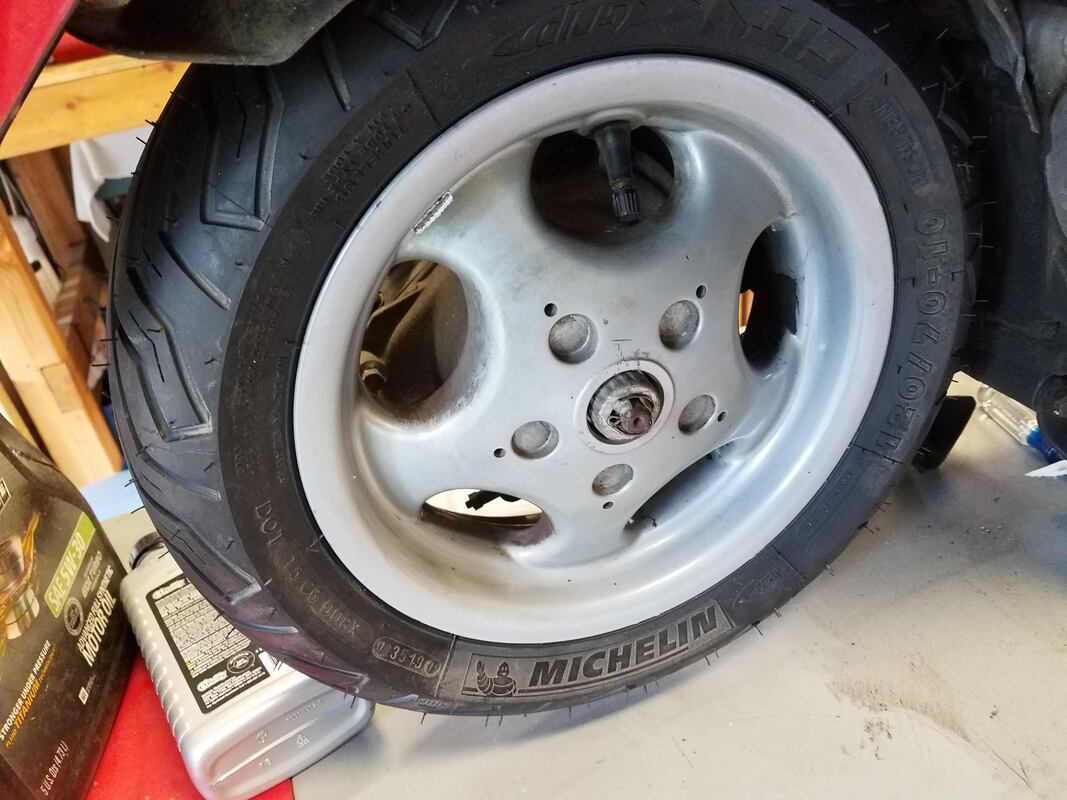
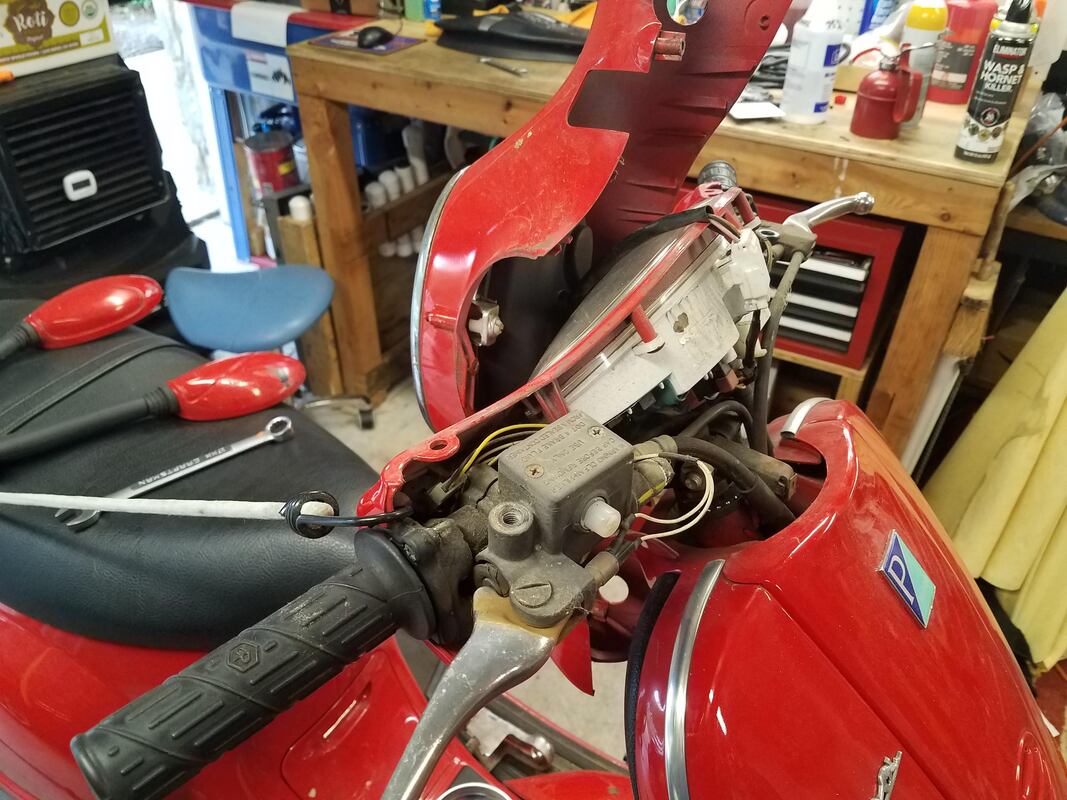
Not much sophistication is required. An ordinary syringe provides all the suction required to open the valve when connected to the vacuum port on the bottom of the petcock. A little white plastic fitting was used to connect the fuel hose to a longer piece of scrap hose leading into a disposal bucket and è fatta (it is done). The rest of the work is pretty normal stuff, except that Vespa uses the oddest collection of nuts and bolts imaginable. It is a tiny, lightweight machine, yet it has some of the largest nuts and bolts you will see on a motorcycle. The front brake caliper bleed screw was half as big as the entire caliper. I suppose Italian lovers are know for having a few idiosyncrasies... Her brake fluid was nasty and low, but cleaned up nicely. Removing her rear wheel requires first removing the exhaust manifold and muffler (not unheard of). Getting to the front brake master cylinder required removing the headlight faring (weird). But, her rear brake shoes and front brake pads were just fine. The front wheel is attached with five little lug screws, allowing the brake disk and caliper to remain untouched when removing the front wheel, just like your car does (very cute). Tires were a little bit of a battle. A normal larger motorcycle wheel is a bit easier to mount because the curve of a 17 inch wheel is much gentler than the curve of a 10 inch wheel. The amount of flex require to mount each tire is about the same, but it is a much larger percentage of the tire diameter when the wheel is 10 inches in diameter. A little tougher...but certainly within reason.
So there you have it. The hot little Italian number is back home doing what she does best, making big smiles. What more can a WrenchMonster ask for?  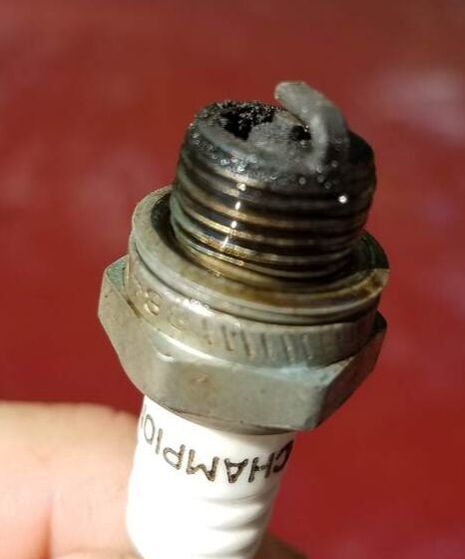 The only thing that stands between your engine and death is oil. Did you know (I was shocked when I leaned), that the major turning loads in your engine are NOT supported by ball bearings, or roller bearings, or anything else that rolls? All the main loads are carried by a round part stuck into a round hole, with room for just a microns-thin film of oil between the shaft and the hole. That's it. A thin film of oil. And how those parts suffer if there are bits of dirt or metal in that oil. And may the engine gods have mercy on your engine's soul if the oil is gone. Metal rubs on metal, heat builds up, the metal expands and soon the gap is gone and the shaft welds itself into the hole...and that's the end. So...dirty oil and low oil...bad, bad, bad. But what happens if there is too much oil? Mechanical sickness and engine death are ready and waiting for you there too. Let me count a few of the ways... Why do I bring this up? This year I have had three over-oiled machines come into the shop. One wouldn't turn at all. One wouldn't run. The third, fortunately for the owner, had already died and the engine had been over-filled in a misguided attempt to revive it, so it was never re-started with too much oil, fortunately for him. The basic problem is that excess oil goes places it shouldn't. More on that in a moment. The other problem, is that with most engine designs, excess oil gets splashed excessively...to the extent that it becomes foamy... foamy oil doesn't flow, and cannot go where it is needed...which is just as bad as having too little oil. How does this happen? The connecting rods that connect the pistons to the crankshaft travel down into the upper reaches of the oil pan at the bottom of the engine. If they hit the oil, it splashes and becomes filled with air bubbles...it foams. So, too much oil puts oil was where it was not supposed to be (too high in the oil pan) and foamy oil is the result. You recall I mentioned the over-oiled engine that would not turn? That engine had a horizontal cylinder. It pointed sideways rather than mostly up. It was a lawnmower and most lawnmowers are designed that way. In that case, while the engine was off, the excess oil seeped past the piston rings and filled up the cylinder. The cylinder is not supposed to have anything inside it but air and a few molecules of fuel. When the owner went to start the engine, the piston could not rise in the cylinder because the cylinder was full of oil. Air will compress; liquids, including oil, will not. The piston might as well have been welded to the cylinder walls. It would not budge...until we pulled out the spark plug and drained out the oil stuck inside the cylinder. After that, we drained the oil down to normal level, cleaned, dried and reinstalled the spark plug...and fired it right up. The next guy was not so lucky. The next engine would turn, but wouldn't run. The plug was completely fouled (caked with residue burned carbon from burning too much oil), the air cleaner was soaked with oil and the exhaust was dripping oil. In this case, the cleanup required was a little more extensive, but in the end, the result was the same. After draining out the excess oil, getting a new clean filter and a clean plug, she fired right up. She smoked like crazy as the excess oil in the exhaust burned off, but after running for five minutes, the excess oil had cooked off, the smoke stopped, and she ran like a top. So, how does one prevent this ugly problem? First, read. Read the manual. These days, a little Google searching will turn up reliable documentation on your engine that will tell you how much, and what sort of oil your engine needs. Next, check the dipstick. Most engines have a dipstick, and those that do not generally have a sight window that allows you to see the oil level from outside the engine. 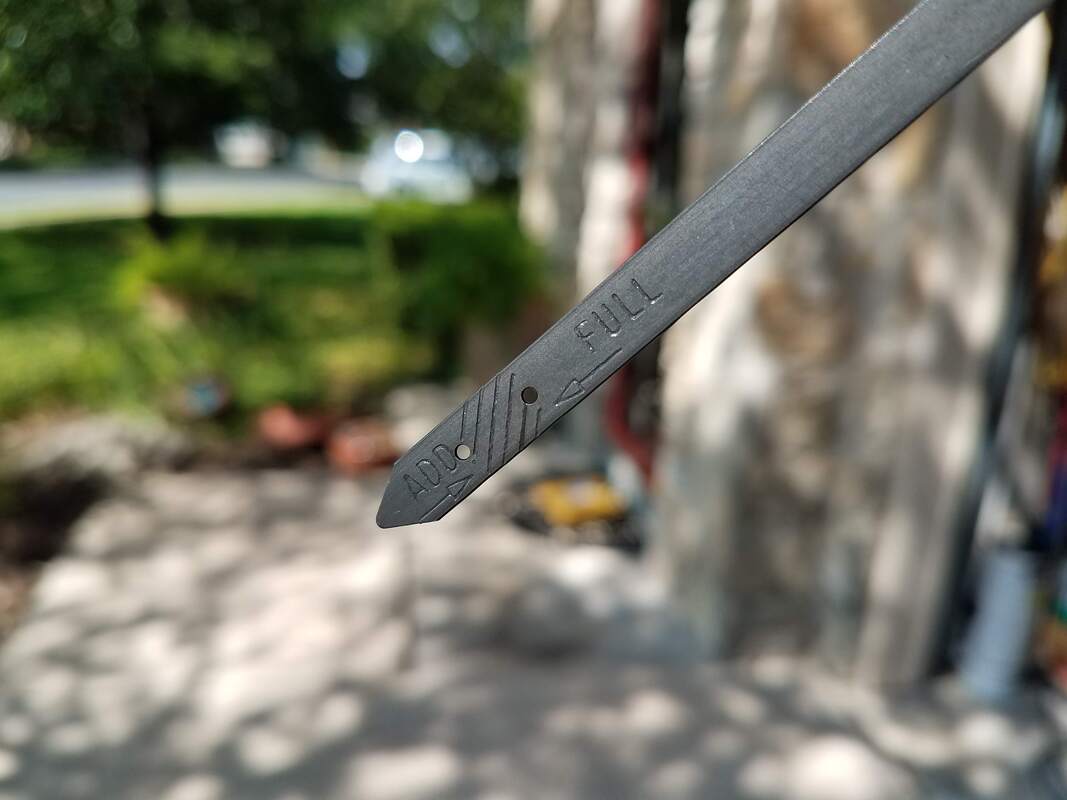 After the engine has been off for at least a few minutes, sitting on level ground, pull the stick, wipe it clean, (like the one you see above), stick it back where it came from, and pull it out again. When you do, you should see oil on the stick, somewhere between the ADD and FILL marks. Too low on the stick, add oil. Too high on the stick, like you see in this next photo, (You see the stick is wet right up to the L's in FULL, way past the point of the FULL arrow)... 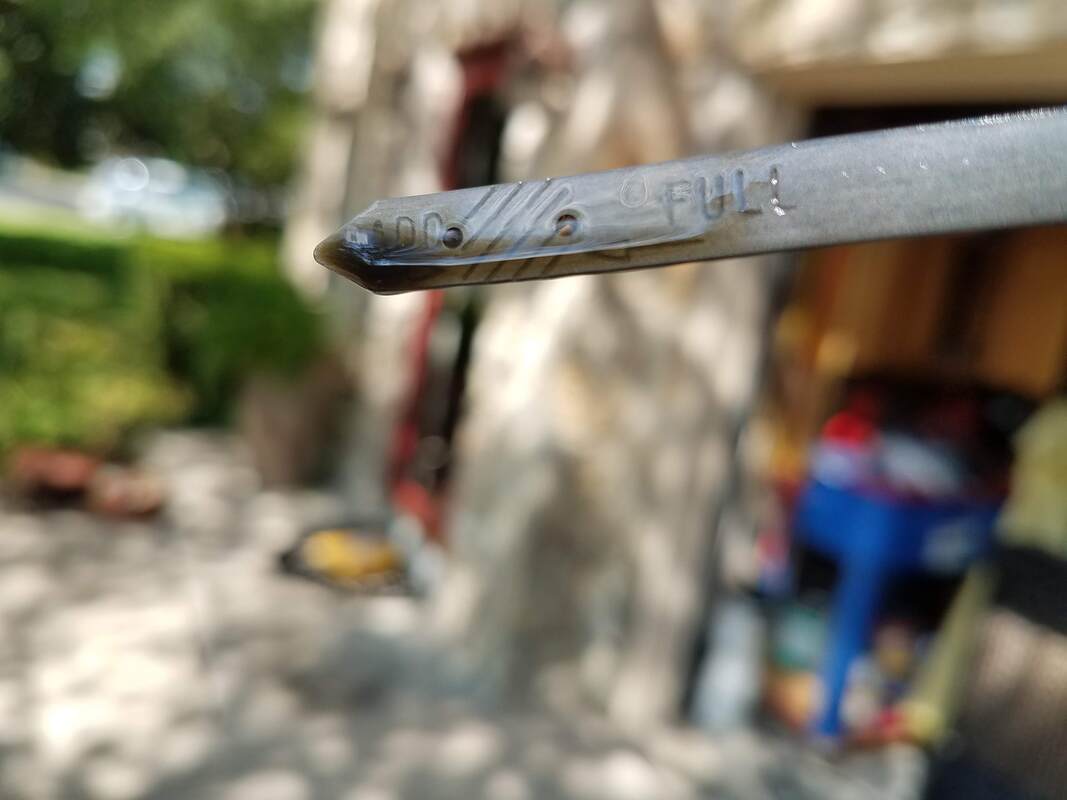 ...then it is time to get rid of some oil. Drain some or use something to suck it out (something besides your mouth, like a plastic tube and a turkey baster!). Once your oil level is right, your mechanical life can go back to normal.
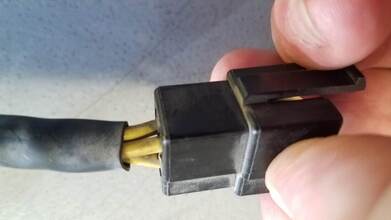
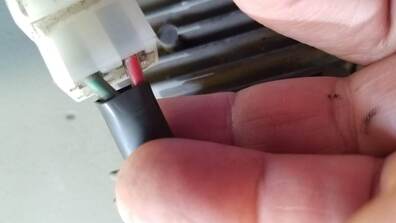
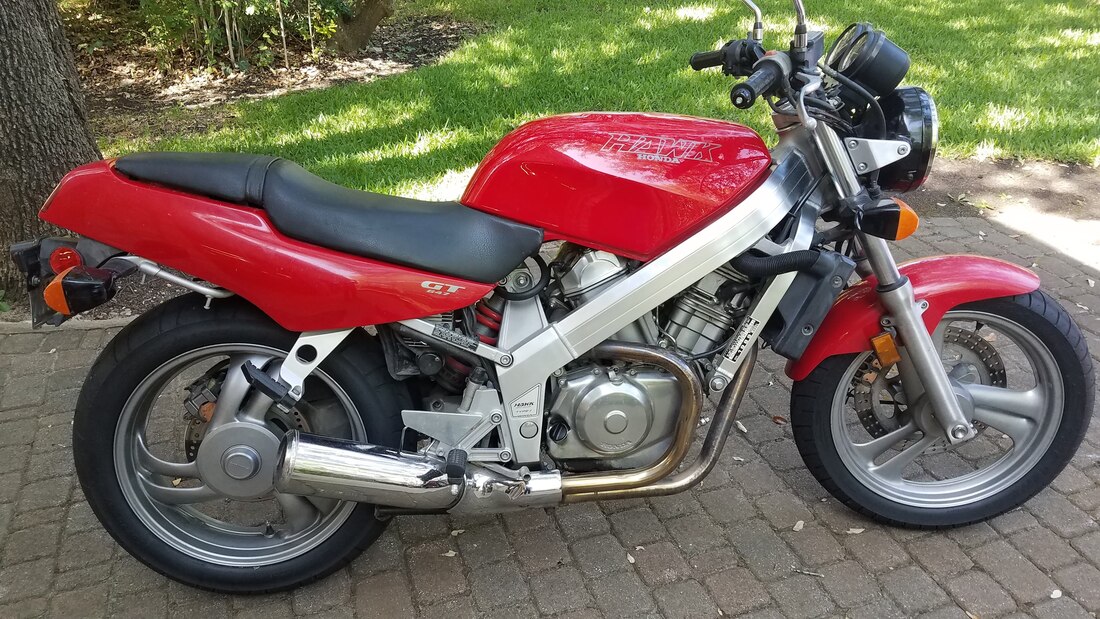 Here is a 1989 Honda Hawk GT. It is a mid-size (650 CC) street bike that had a short manufacturing run but still enjoys a strong following. The Hawk has a very elegant single swing-arm rear suspension and a very cool eccentric rear axle carrier that allows for simple chain tension adjustments and obviates the usual sprocket alignment adjustment. The fuel tank is secured with a removable bushing up front. The rear tank mounting bolt is used to extract the bushing from the frame when removing the fuel tank (so cool). The only fly in the ointment on this design is a difficult to access front left spark plug. This is the second Honda V-Twin I have encountered that makes access to the front left plug so difficult that it requires a special tool. Fortunately, the Hawk comes with the required tool and the owner of this Hawk still has the stock tool kit that came with the bike. The Hawk came in able to idle but wouldn't rev up and run. Having been parked with fuel in the tank for a few years, being a carbureted bike, that was not surprising. She had tires with good tread but rotten, cracked sidewalls (very dangerous) so they had to go. Her oil was old, her chain was rusty, her coolant and brake fluid were low and dirty. On top of that the turn signal switch wouldn't work worth a darn. Very sticky. CV-19 made getting OEM parts really slow and difficult, but in the end, everything but the fork rebuild kit showed up. We will get to the forks later. The carbs cleaned up well. The rubber carb mounting boots were original, cracked, and hard as rocks, so they got replaced. The new Michelin tires look great. The replaced brake pads and new DOT4 fluid are working fine without having to rebuild the master cylinders. There were some non-metallic particulates in the old coolant but the flush cleaned all that out. The very elaborate air filter was dirty and got replaced. Some plastic parts, like a fuel line tee and a small foam filter in the pollution control system, simply crumbled when handled, and had to be replaced. That was not surprising for a bike that is over 30 years old. And dismantling the turn signal switch, giving it a good scrub and lube has it working like new. So overall, almost nothing but ordinary maintenance was needed to bring this Hawk back to life.  She did need some new bar ends (one, it seems, went missing some time back). But that was obvious. What was not obvious until the test ride, was the voltage regulator was dead as a stick. Motorcycles have alternators. As a rule, they generate 3 phase AC that gets fed to a rectifier / regulator that converts the AC voltage, which may go higher than 60 volts as the engine revs higher, into DC and holds the voltage supplied to the battery to anywhere from 12 to just less than 15 volts (i.e. normal charging voltage for all our cars, motorcycles, scooters and lawn tractors). Most automotive alternators have the voltage regulator built into the alternator housing. But as a rule, motorcycles have a separate regulator that plugs into the wiring harness of the bike. It often looks a lot like the one on the Hawk. 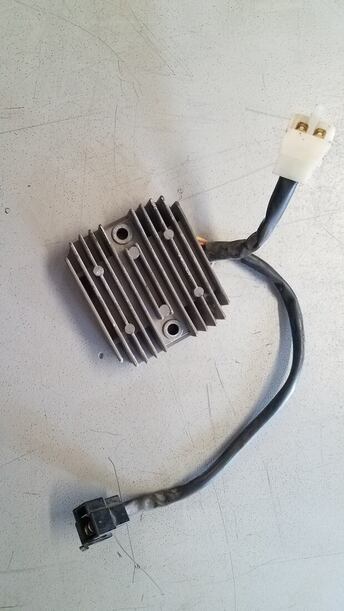 It will have three (usually yellow) wires that accept the three phases of AC current from the alternator and two or more wires that deliver the DC current (often +12V Red and Green Ground).
That makes diagnosing charging problems pretty easy. If you unplug the regulator and still have AC voltage coming out of all three phases of the alternator (specifically, from the Stator windings) but do not have good charging voltage when you plug the regulator back in, the regulator is bad...and so it was with the Hawk.
When the new regulator arrived, it took a little effort to dig the old one out of its hiding place in the bike, but the new one fit like a glove and worked like a charm. This little Hawk GT rides like a dream and I predict will run another 100k miles...and will probably generate almost that many smiles. 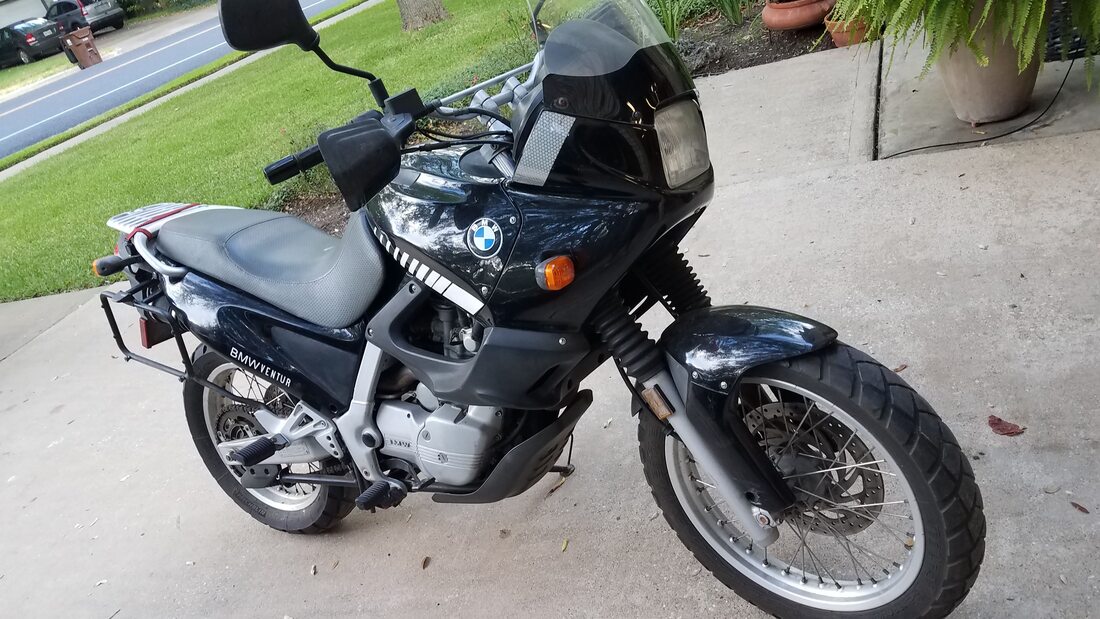 This is a 1997 BMW F650ST, also known as a Funduro. A client had just bought it and brought it in to be made roadworthy again. It had been sitting parked for a few years...and had a few problems...most of which the seller did not disclose. Some were obvious (like, it wouldn't start!). Some only became apparent after it was running again. THE OBVIOUS
 Once the carbs were cleaned, rebuilt and re-installed, the bike got new spark plugs and fresh gas and then fired instantly, (Yay!) Unfortunately, there are some things that just cannot be known until the engine starts running and test rides get underway. THE NEWLY OBVIOUS
The radiator went to a repair shop, which fixed it successfully...full flow, no leaks. Then the thermal switch that controlled the fan was proven dead and was replaced. The radiator cap was replaced just for good measure, a step that was way overdue. The upshot? No more overheating! The battery was still running down. Some quick testing showed that the alternator was producing 3 phase AC voltage (> 50 VAC per phase at 3k RPM), just like it should, when it was unplugged from the rectifier / regulator assembly...and was not when the regulator was plugged in...and the regulator was not producing charging voltage (~14V DC) when the bike was running. So...a clear case of bad regulator. In addition, in the course of troubleshooting the electrical problems, we discovered a couple of spots in the wiring harness (between the alternator and the regulator) that had gotten so hot at some point years ago that insulation was burned off. It was pretty plain that connectors had become corroded and gone ohmic (partially open), resulting in overheated connectors that burned the wires. The bad connectors were cut out of the wiring harness and replaced. We tried a cheap knock-off regulator, but it too failed within minutes of installation. A couple of days later we had a genuine BMW unit installed and the charging system was cured. Like magic, the bike produced 14.4 VDC to the battery @ 3k RPM. Perfect. The previous cursory inspection of the engine oil drain plug had revealed it had been installed with no crush washer, so a leak was no shock. But when a new crush washer failed to stop the drips, it was clear that a closer look was needed...and the sight was appalling. The drain had been manhandled by a neanderthal on multiple occasions. For starters, at some point, someone had screwed the plug in so tight that they cracked to block. (Note: This bike uses a "dry sump" oil circulation system, meaning, it does not have an oil pan on the bottom of the engine. Instead, oil is scavenged off the bottom of the crankcase and pumped into an oil storage tank, from which it is pumped back into the engine. The design is better for off-road bikes that would go into oil starvation if oil were splashing around in a big oil pan when the bike was bouncing around off-road. So...the engine oil drain plug is screwed into the block itself...not into a replaceable oil pan. ) So...yikes! The good news turned out to be that the crack had previously been repaired. Somebody drilled out the case and installed an insert that was tapped for a new plug, which effectively sealed the crack. The bad news was that some other moron had since over-tightened the plug again (without a crush washer) and had chewed chunks out of the mating surface where the washer was supposed to land. There was no way it would ever seal. Well, desperate situations call for desperate measures. Judicious application of fine grit wet/dry sandpaper and a flat sanding block whittled the drain hole outer surface down to flat...at least flat enough for the sealing washer to fill any gaps. It worked. No more drips.  ENHANCEMENT PROJECTS There were just a few more items to cover.
 The broken analog clock in the dashboard would have cost a king's ransom to replace. It fits into a standard 2" round meter hole, so swapping in a standard 2 inch $20 DCV panel meter, which is infinitely more useful, was a no-brainer. And the power outlet and phone mount went onto the handlebars with minimal fuss. The outcome? See for yourself. Looks like a pretty happy customer to me. 
I emailed Dave and quickly had a diagnostic appointment in which we talked through some basic troubleshooting and came up with a plan of attack. Dave emailed me over the weekend to let me know he couldn't resist poking around a little, had identified what we needed to work on, and gave me a short list of specific parts to buy (and exactly where to buy them) before our work appointment.
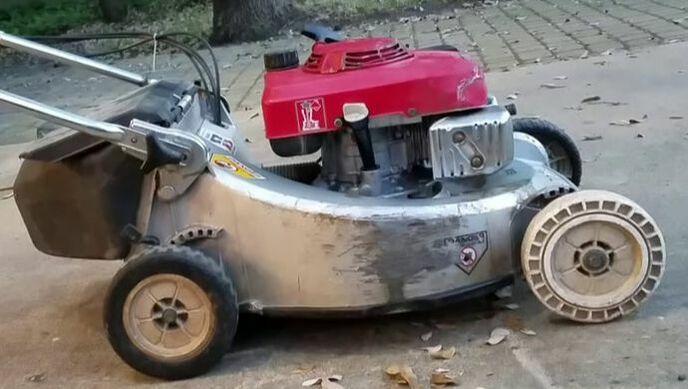
It turns out my issue was largely due to missed maintenance, but Dave took time to explain both how to fix the issue I'd created and take proper steps to avoid it in the future. In addition to best practice maintenance (oil change, cleaning filter, gas storage), I also learned some "basics 2.0" items like spark plug gap spacing, applying the recommended torque when installing a new plug, troubleshooting and draining a carburetor, etc. Not only do I feel a lot more informed and empowered to tackle engine issues in the future, I had a blast hanging out with Dave and learning from him. In addition to being an expert, he's a super easy-going guy and a gifted instructor. I'm lucky to live near WrenchMonster, but it's worth the drive even if you don't. Don't hesitate to reach out to Dave on any engine issues big or small. - Wyn Gregory Austin, TX (Yes, the post title is a dad pun....for which Wyn bears no responsibility. - ed.) 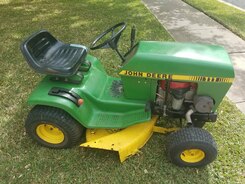 Some things were just obvious. The battery was missing. She was covered with dirt and chaff from sitting in an open pole barn on a farm near Taylor for a few years. Her tires were flat and her ignition switch was gone...and her model number indicated she was pushing 40 years old. But when I reached in and grabbed the output pulley, and tried to turn it by hand, her engine would move...so off to the shop she went and the search for parts got underway.
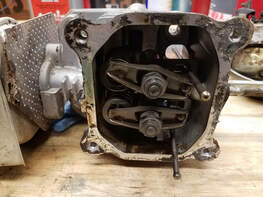
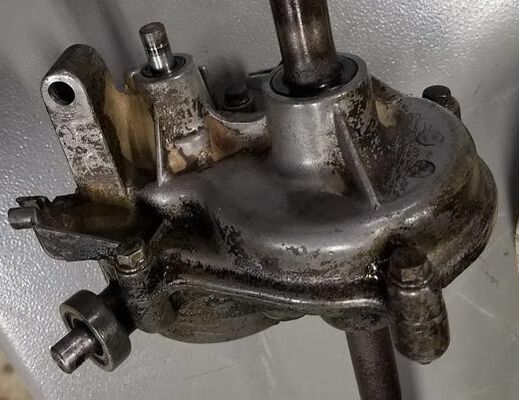
She had fuel in the cylinder. The spark plug was sparking. The compression was ok. What the heck?! All you need is Fuel, Fire (at the right time) and Compression and an engine will run. It must run. The starter spins the motor like a demon, but it won't start. It won't even pop once. It is definitely NOT running. What's happening?! Have you guessed yet? Yep. Ignition Timing. Spark really does need to happen at the right time. This engine has a three-phase alternator integrated into the flywheel and the top of the engine case. It is so simple it doesn't even have a voltage regulator. It keeps the battery charged...barely. But that's it. It has nothing to do with the ignition system. 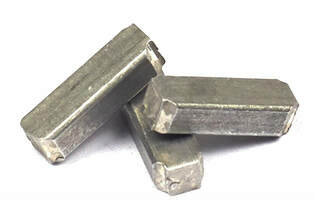 In addition to the magnets that form the alternator, there is one more magnet mounted in the perimeter of the flywheel and it swings past a coil of wire that is connected to nothing except the spark plug. When the magnet comes by, it generates a pulse that sparks the plug and fires the charge in the cylinder. Simple. No points to set. No condenser to short out. Foolproof...except for one little detail. Recognize these shiny little aluminum rectangles? They are Woodruff Keys. The position of the flywheel on the crankshaft is critical because the ignition magneto must cause a spark at exactly the right time in the engine cycle. One of these little woodruff keys fits into a slot cut into the crankshaft and a matching slot cut into the hub of the flywheel, so that when the flywheel is mounted on the shaft, it is certain that the alignment is exactly correct...unless... Sometimes something happens...a backfire...and violent engine stop...a loose flywheel bolt...and the flywheel rotates on the shaft anyway, shearing the poor little soft aluminum key (but absorbing energy that might otherwise do more damage), and screwing up the ignition timing. The solution? Pull the flywheel, realign it with a new key, torque the mounting bolt to spec and try again. And she fired right up. Ran like a top. Two days later she was back on the job, roaring through grass like a 20 year old! Way to go Deere! 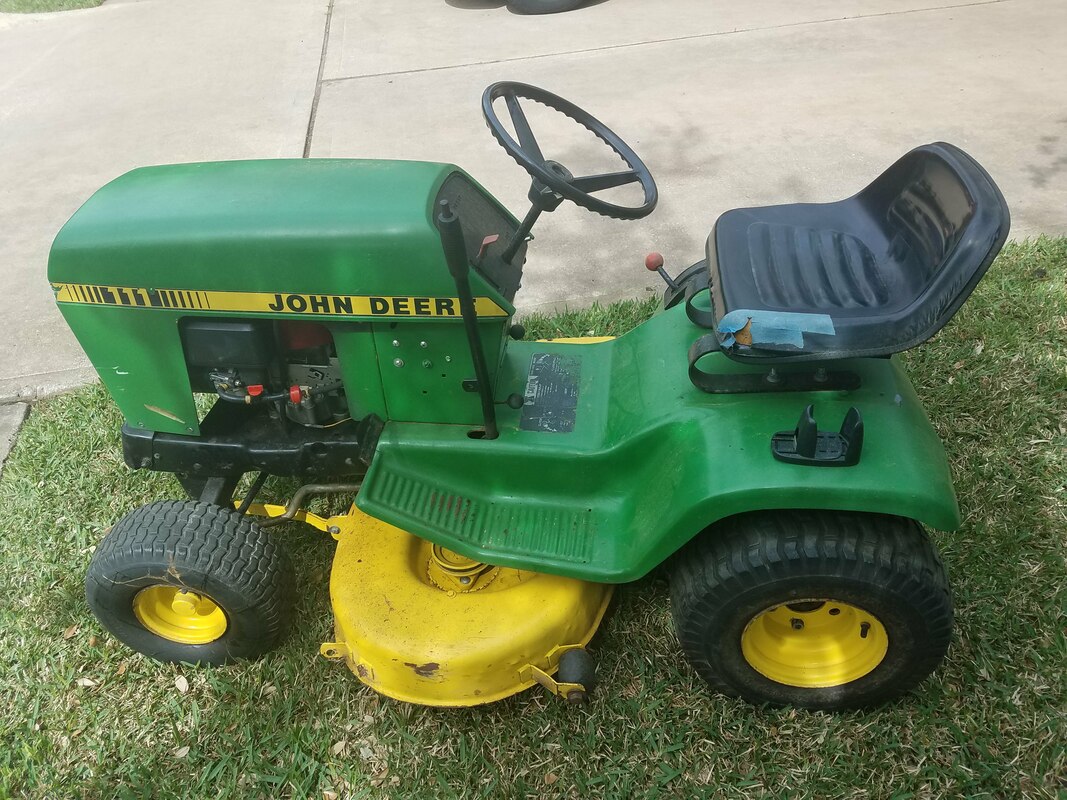
 Disconnecting those items from the engine quickly proved it was the engine that was locked. Bummer. This little Honda may have cut her last blade. With nothing to lose, we pulled the head and took a look. Although covered with tar-like oil, the valve train looked ok. The piston was stuck almost at TDC (Top Dead Center), so we couldn't see the cylinder walls. After applying a big dose of acetone and Automatic Transmission Fluid (the hot ticket for penetrating oil applications), and considerable muscle, the piston broke free and would turn by hand. More oil and more turns revealed no untoward noises and the cylinder walls did not show any scars.
 She blew a little smoke at first but ran like a top!
Next up was the transmission, which was stuck in high gear. After removal from the mower (which requires removing everything connected to the rear wheels) it was disassembled and cleaned. Inspection showed normal wear but nothing broken, so she got a full load of gear oil and went back together with no leaks (to my complete amazement). Back in the mower, with the control cables adjusted to spec, the trans shifted like a dream and the little Honda that almost went to the dump is back home and cutting grass like like a champ. Yes, she smokes a little on start-up...but heck...she's 30 years old. I think that's allowed. 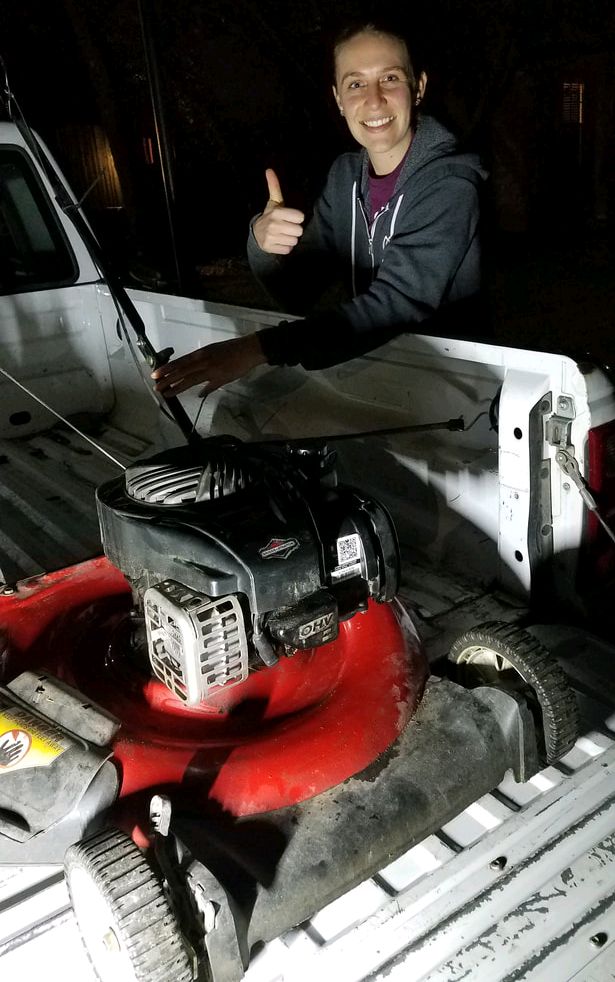 I had a fun and productive session with WrenchMonster getting my lawn mower running again in time for Spring! Learning what to do when "it just won't start" after winter is a game changer. I now know how to best maintain the mower in the winter time and how to tune it up (myself) with new spark plugs and cleaning of the fuel system if it doesn't start up in the future. So cool!
Dave spent half the time teaching the basics of engines and tools we were using and half the time getting hands-on replacing spark plugs, doing oil change, and cleaning the carburetor, etc. After all that, the mower is in working order (yay)! Working with WrenchMonster is such a great value to not only get things fixed and working today, but learn how to do it yourself and not be dependent on a repair shop and service costs in the future. I will definitely return to WrenchMonster with any future projects, and would highly recommend WrenchMonster to anybody who would like to learn to become more self-sufficient to fix and tinker with things - mowers, bicycles, you name it! - Maggie in Austin
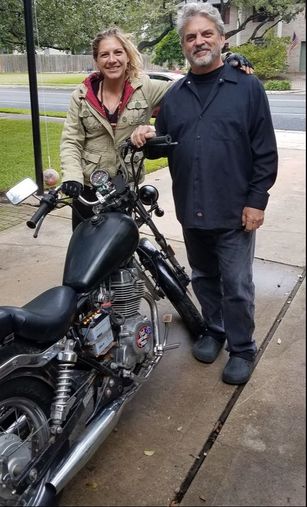 Meeting David was one of the best things that has come off Craigslist! This road angel helped me take my Frankenstein 1985 Honda Rebel and transformed it into an awesome little cruiser. We spent 3 long days tearing apart the parts that hadn't been maintained since conception of the bike, and adding new and updated components. His expertise, know-how, and wide range of tools and parts made the job go by with a lot less headaches than it could have been. Needless to say, I never would have been able to get this bike in the condition he helped put it in. Not only will I refer back to him with future projects, but I will highly recommend his WrenchMonster shop to any and all of my two wheeled aficionados. Upon leaving his helpful hands, I felt exponentially more competent with changing my chain, tuning up the forks, adjusting the brakes, connecting and soldering wired components, and changing out fluids. He was eager to teach, patient to explain, and able to demonstrate tasks I found difficult with ease. I am extremely grateful for WrenchMonster and hope to see this endeavor take off here in the Austin area! To long and beautiful hill country rides! See you on the road. ~Alexis From Texas |
Categories
All
Archives
January 2024
|


 RSS Feed
|
© WrenchMonster 2018
|
WrenchMonster™ is a Division of DemonLite, LLC.
|