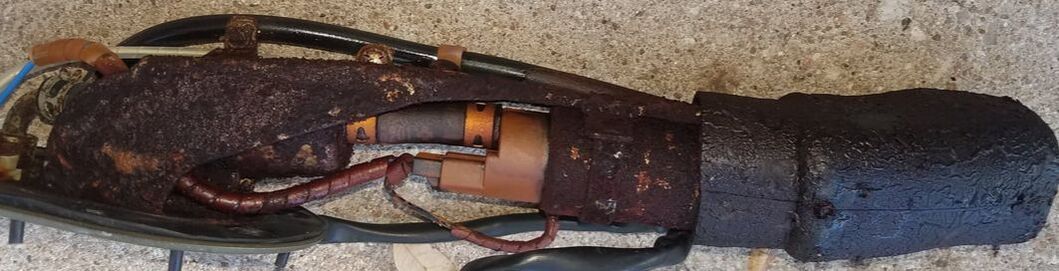
 Much better... This is the result of about one gallon of gas left in a three gallon tank for five years. The nasty object above is the in-tank fuel pump and integrated fuel filters. That is pretty easy to fix. All you need is $500 and the time to remove it, rebuild or replace it, and reinstall a few bolts. Not cheap, but pretty easy. (Sure, you need to drain and remove the gas tank, which may require a pump and lots of disassembly time...and then you need to put it all back together correctly, but that isn't rocket science either.) The inside of the tank itself is a bigger problem.
The rehabilitation of rusty fuel tanks seems to be a religious matter. Doctrine ranges from "Don't...just replace it", to "Clean it and coat the inside with (insert the name of some sort of paint-like product here) ." And recommended methods for cleaning are all over the map too, ranging from "Rinse out the chunks and call it done." to "Fill it with (wood screws, abrasive, BB's, etc.) and (shake it, tumble it, vibrate it, etc.) . I have tried some alternatives and today I generally take a middle of the road approach. I will say, if I had a big tumbler system or high powered ultrasonic wand that I could insert, I might do differently, but I don't. So I keep it simple.
I do not paint / epoxy tank interiors. I believe it is risky (the paints can degrade / flake off) and that fuel filters are really pretty good. Sure, keep a weather eye on your fuel filter(s) after you start riding again. If they start filling with rust then further intervention may be needed. But if you care for your tank with two final steps, that is not likely to become necessary. Step 9 - Fill your tank all the way on your way home from each ride. The water in the tank does not (mainly) precipitate out of the gas. It mostly enters your tank in the form of humid air. Once inside, the water condenses out of the trapped air in the tank and falls to the bottom of the pool, where it does its dirty work. If there is no air space at the top of your tank, there is no water vapor to condense inside, and your rust problems are considerably reduced. Naturally there are other alternatives. You can drain the tank absolutely dry. That works too. Step 10 - Ride often. (Or at least run the engine for a half hour each week...and then top up the tank with new, not stored, gas.) But here's a word of caution regarding that full gas tank. Modern Ethanol-mix fuel harbors bacteria that eat ethanol and piss Acetic Acid...which will eat everything metalic in your fuel system, especially aluminum parts. Yes, I know I just recommended filling a rusted tank up with 30% Acetic Acid, but I also said get it all out when you are done. The bacteria in your tank are kinda slow growers, but if a tank has been sitting for a month or so, even a completely full tank, the bacteria bloom is underway and will accelerate exponentially over time until the bugs die in their own piss. If you have ever seen and/or smelled green fuel in a tank, you have seen the aftermath of a bloom for yourself. If you are not going to keep fuel rotating through your tank (burning up the blooming bacteria and re-filling with fresh gas) then at least use a fuel preservative product like Stabil, to keep the buggers at bay for a few months. If it is going to be longer than that, drain that tank...completely dry. (Full disclosure: water does come into the tank mixed in solution with the ethanol in the fuel. Water does not mix with gasoline, but it does mix beautifully with alcohol, as your bartender can readily confirm. And any batch of ethanol-gas you get may have water trapped in the ethanol. If you get a tank with high water content, the next tankfull is likely to dilute the concentration of water in the tank. Just another reason to keep using the gas in the tank regularly.) So...either drain that tank dry or fill it full and burn some off every week. Don't give rust a chance. Like Neil says, better to burn up than it is to rust. Comments are closed.
|
Categories
All
Archives
January 2024
|
 RSS Feed
|
© WrenchMonster 2018
|
WrenchMonster™ is a Division of DemonLite, LLC.
|