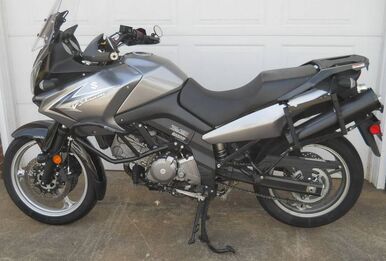
 A very pretty 2009 Suzuki V Strom 650 came into the shop last week. She looked showroom fresh, with less than 2k miles on her. Needless to say, she had been parked for years...and sadly, with a half full tank of gas...which, predictably, turned into a tank full of rust.
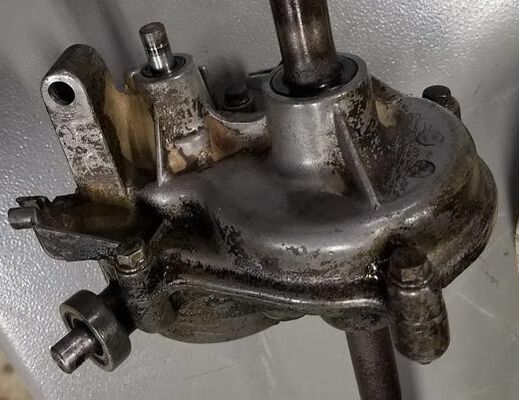
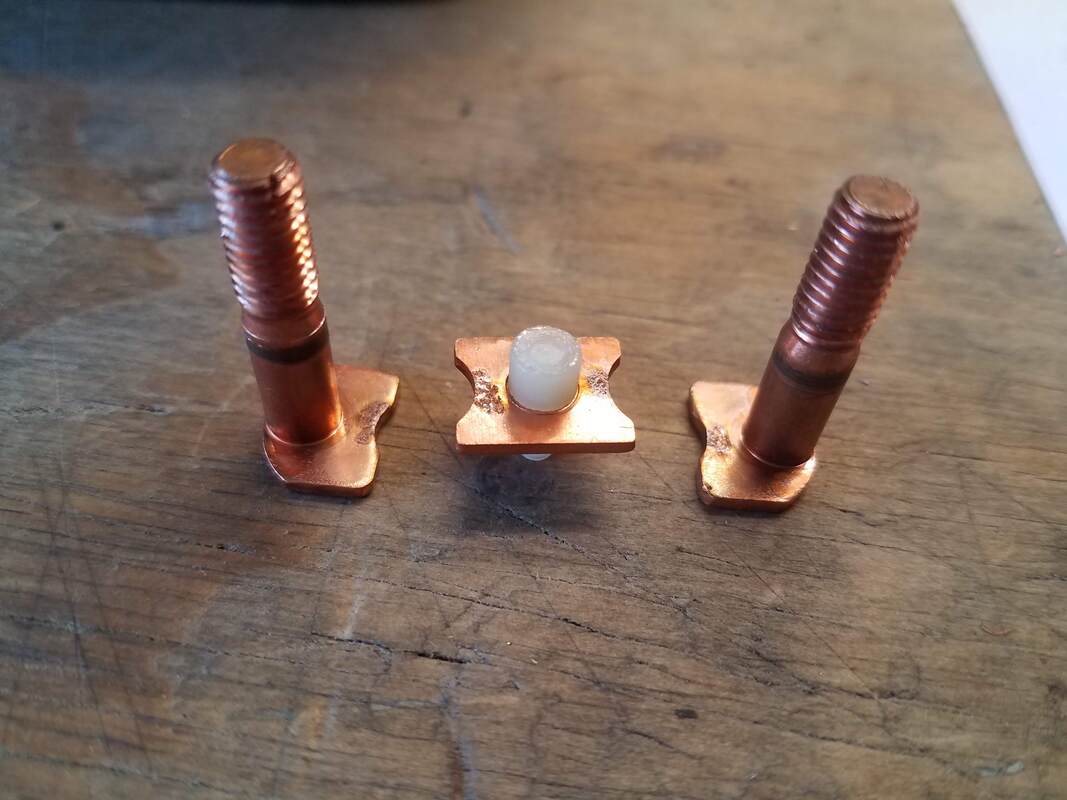
The owner had already cleaned the tank and replaced some or all of the fuel pump assembly, which lives inside the tank itself, but despite these ministrations, she would bog down under load. She idled like a champ, but just wouldn't pull when the rider cranked on the throttle. Very frustrating for the owner. There are a number of esoteric possible causes for that behavior, but the most obvious thing to check is fuel pressure, which is a proxy for looking at fuel flow. This is a fuel injected bike, so fuel pressure is supposed to be pretty high, around 60 PSI. Fuel injectors just won't work right if the pressure gets too low. And if the fuel pump assembly cannot keep up with the fuel demand from the engine (as the engine control computer tries to get it to make more power), then the fuel pressure in the fuel supply line is going to drop. Because spraying 60 PSI gas around your shop is a bad idea, selecting the right fuel pressure test rig is important. Fortunately, bike manufacturers have largely selected standardized fuel line fittings when they design their bikes. In this case one of the mid-size quick disconnect fittings was just the ticket and that allowed disconnecting the fuel line from the tank, plugging in the tester T-connector, reconnecting the fuel line to the Tee and then hooking up the pressure gauge to the open end of the Tee. The results can be seen at the links below... Start and Blip Throttle and Advance to Higher RPM What you see here is a significant drop in fuel pressure as engine RPM is increased...despite the fact that the bike is just sitting in the shop in neutral, not even spinning the back tire. So even with zero load on the engine, the fuel pressure drops...a lot. You might even notice in the second video that you can hear the RPM begin to drop (despite increasing throttle) when fuel pressure gets near 20 PSI. It is significant that the pressure drop is smooth. Pressure rolls off steadily as RPM increases. It does not, for example, spike low intermittently and then pop back, which might suggest an intermittent electrical connection to the (electric) fuel pump. Nope, this sure looks like plain old low flow. The fuel pump assembly just cannot keep up. Now why say "fuel pump assembly" and not "fuel pump"? Because inside the tank there is not only a fuel screen / filter, there is also a pressure regulator, as well as the pump itself. Poor flow could be caused by problems with any one of them, not to mention the possibility that the fuel pump assembly components themselves may have been misassembled and are leaking fuel from the pressurized lines inside the tank into the low pressure area inside the tank itself. That would not produce a fuel leak that is visible outside the tank, but it could cause a pressure drop in the fuel line when fuel demand increases. So, how did this all turn out? We don't know yet. Now that he has a solid answer on the fuel pressure question, he and his bike are back home awaiting the arrival of a new Suzuki OEM Fuel Pump assembly, which he will install after taking another good look inside that tank...to see if another cleanup is in order before installing the new pump. Stay tuned! 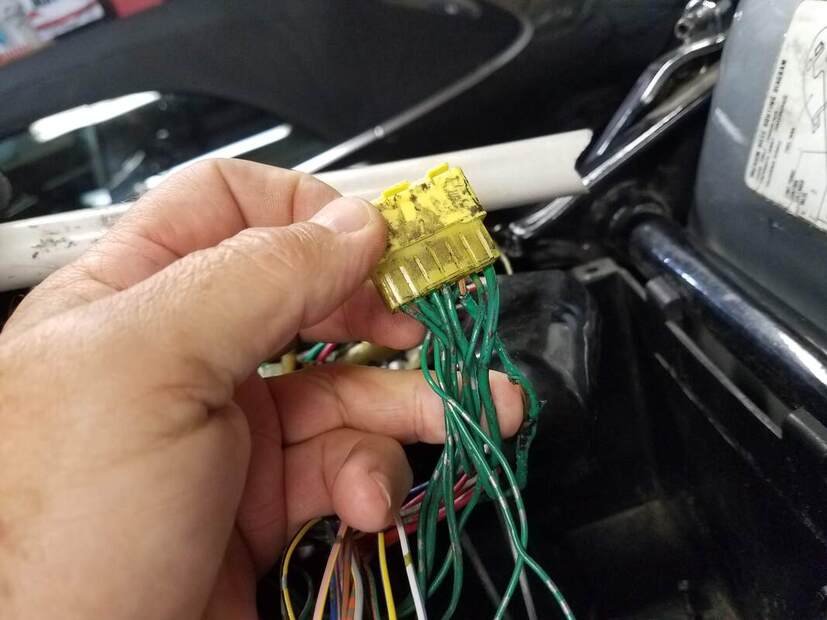 See that burned wire? When this 2002 Honda VTX 1800C heavy cruiser came into the shop, she had been parked for 5 years with an electrical bug. Over the months preceding her last ride, she had run worse and worse until finally an attempted restart resulted in smoke curling up from under the seat and fuel tank. The owner wisely gave up trying to start the engine so, thankfully, a fireball was avoided. The owner had some wrenching experience, so he pulled the seat and tank and found burned wires but no blown fuses. Nobody seemed to have any clues about what to do, so the bike just sat. When the VTX came in, other than being partially disassembled, she was pretty as a picture...but missing her battery and had a third of a tank of rusty gas. Some of the smoked wires were visible and the story was that she had run very badly at low RPM before she finally died, and that part of the difficulty before the bad running developed, was that attempted starts often failed because the starter motor often wouldn't turn. Some mechanical pundits had suggested a bad battery, others suggested a bad starter, others suggested a bad starter relay, all of which had been replaced on various occasions to no avail. Very interesting. Step one was a deep dive into the bike schematic to see how a GROUND wire in the harness could burn up without blowing any fuses. Interestingly, the bike did have a Honda Service Bulletin for an electrical issue... The VTX-1800C, for a time, rolled out of the factory (a USA factory) with the far end of the main ground wire from the battery connected to the wrong place on the frame of the bike. But that fix, putting the ground lug where it belonged, had been long since done. Something else was amiss. Close reading of the schematics and tracing out where all the ground wires went didn't offer much help. Everything in the schematic looked pretty normal. The fun started when the bike wiring itself was compared to the schematic. Uh Oh... 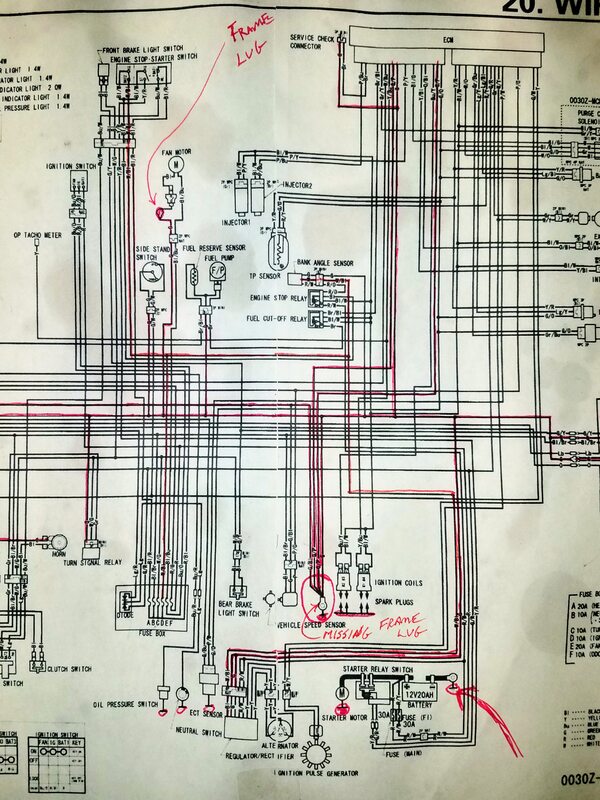 The bike itself was missing a ground lug connection...THE ground lug connection...the main ground junction in the wiring harness where all the smaller ground wires from all over the bike come to a single ground lug that gets solidly bolted to the frame. The result was that ground current from every device on the bike that was not itself grounded directly to the frame (such as the Fuel Injection System and the Starter Relay) was being routed through a very small wire that ran about two feet long from the harness ground junction under the seat (shown in the photo at the top of the page), under the gas tank, to a small secondary grounding lug adjacent to the radiator at the front of the bike. Yep, you guessed it...the very wire that had gotten so hot it melted and/or burned away its insulation. Other high current items like the spark plugs, the starter motor and the radiator fan motor were all grounded directly the the frame itself...which was connected back to the battery with the big fat battery ground wire via the now repaired battery cable main frame lug. But there was still lots of stuff sending current back to the battery by way of this poor little, now smoked, green wire. How could this happen? The missing harness ground lug was so bizarre, customer modification of the bike was the most likely explanation...but a call to the local Honda dealer techs confirmed that the connector with the burned wire but no lug, was indeed a stock Honda connector. There is only one explanation, this was a birth defect. The Product Engineer(s) responsible for the manufacturing of the bike at the factory had screwed up TWICE, first by allowing the battery wire frame lug connection error to enter production (resulting in a Service Bulletin), but also by allowing the elimination of the main harness frame lug. Clearly, the bike design team knew the lug was needed to handle return currents from all over the harness. It was right there in the schematic...but not on the bike. That is on the Product Engineering team. That ground lug should not have been eliminated. In fact, it is likely that the missing lug has actually been the primary problem that has plagued VTX 1800s all along...and that the Service Bulletin cured an inconsequential problem but missed the real issue. So why don't all VTX 1800s burn up the little wire that runs from the ground junction to the secondary ground lug? Obviously, the little ground wire was good enough to work kind of ok, at least for a while. Lots of bikes rolled out that door that way without immediately catching fire. One of the things that happens with overloaded wires, even if they are not overloaded badly enough to burn immediately, is that the heat in them slowly bakes the insulation around the wire, causing it to become dry and brittle, eventually causing the insulation to flake off and expose the copper conductor inside. If it is a power wire and that bare copper touches a grounded frame member, sparks fly and fuses blow. However in this case, if a ground wire touches a grounded frame member...nothing happens. It's a ground wire. That is where it is supposed to be connected. So in this case, that is not too big a deal. But because the wire was buried inside the big wire bundle that runs from the front of the bike back to the battery and the computer, making contact with an adjacent power wire in the bundle was a real possibility. Testing revealed that, fortunately that had not happened. The next problem is that the wire's connection points can overheat and carbonize, slowly offering more and more resistance to current flow. At first, that might seem ok too...more resistance results in less current flow and less heat. Sounds perfect. Well, not quite. Passing current through a resistance results in a voltage drop across that resistance. That is how they make electric heaters...the ones that get red hot and keep your feet toasty in the winter. Just how hot it gets is a function of power (watts) and the volume within which that power is being dissipated. If the volume of the conductor where that current is flowing is small, then all the power, all the watts, are being concentrated in that small space...and the temperature in that spot can become VERY high. (That is exactly how an Arc Welder works.) As a result, what may start as a small problem can get worse and worse (a little heat degrades the connection a little, but as time goes by, resistance in the connection gets higher and higher until it finally burns up). But on the way toward that fiery end, all the other items in the circuit served by that connection are being starved for voltage. If it is a 12 volt circuit and 3 volts are being dissipated across the resistive connection, then only 9 volts remain to serve the load device...say the Engine Control Computer, for example. Now we have a plausible explanation for what happened. The overtaxed ground wire slowly got worse and worse, stealing voltage from the engine computer...which controls both the fuel injectors and spark plug pulses. Is it any wonder this bike was running worse and worse until it finally gave up the ghost? And guess which electrical component on the bike that uses the harness ground junction, is the one that consumes the most current when it is operating? That's right, the starter relay; the relay that gets activated when you punch the start button. It was during attempted starts that the overloaded ground wire finally sent up smoke signals. The solution? Rewire the main ground junction to a new frame lug to conform with the schematic...and replace the fried wire that ran from the harness ground junction to the secondary frame lug at the front of the bike. And just to be double-dog sure this NEVER happens again, do a complete overkill on the job and use 8 gauge stranded copper wire to do it. So...with the ground wire and ground lugs fixed, everything should be perfect, right? Yea...not so much. Now with the wiring fixed and a brand new battery installed, attempted starts are a complete crapshoot. Sometimes they work and sometimes the bike does absolutely nothing when the starter button is pressed. Jeez now what? A trouble light connected to the relay coil quickly proved that the relay was getting juice every time the start button was pushed, which was no surprise since you could hear it click every time the starter button was pressed. The problem was the starter relay, the one the customer reported was fairly new (as a result of an earlier failed attempt to cure the hard start problem). Fortunately, it is a quick* fix. Yank out the old one and bolt in the new one, reconnect the battery and off she goes. (* Quick, not cheap. A replacement OEM relay was ~$40. Aftermarket relays that looked exactly the same could be had for less than $10...but buyer review reported very high failure rates...so Honda got the order.) But a bad relay is a bit of a mystery. Generally they are either good or bad. This one showed wildly different contact resistance measurements every time it is tested. So (naturally!), an autopsy was in order. After ripping it apart and looking at all the parts, nothing seemed to be wrong with it . Sure, the internal contacts looked a little pitted...but can that be so bad. Well, it turns out, YES!
Connecting the main terminals to an ohm meter and then placing the contactor across the gap (just as it would be when the relay has activated), results in the meter reading "0L" or Over-Range, meaning Infinite Resistance...no circuit, no current flow. no go. These are all solid copper pieces. How can this be? Clearly the carbonizing and pitting shown above on the left is enough to kill current flow in the picture above on the right. Now we have the cause of the no starter reaction when the starter button is pressed...and sure enough, with the new starter relay installed the bike fires right up...
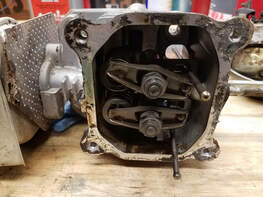
...most of the time. Well, dang. Now what? Sometimes when the starter button is pressed, the starter motor just cannot make the engine spin. And sometimes, it moves it just a bit...and then stalls, like it suddenly got stuck in glue. What's up with that?! Now we finally know why this VTX burned up its overtaxed harness ground wire. It has a failing (or failed) compression relief valve in the engine. Engines with big cylinders (and this 1800cc Twin has some of the biggest they make) have a compression relief system that reduces the air pressure inside the cylinder when the engine is spinning a very low RPM, such as when it is trying to start. Why? Because it is very difficult to get the engine to turn in the compression stroke...when the intake air and fuel vapor charge that the spark plug is about to ignite is being compressed toward the spark plug. If the bike has a kickstarter, a light weight rider might not be able to kick start a big bike without a compression relief system...and if it has an electric starter motor, a successful start without a compression relief system might require both a larger starter motor and a larger battery, which would take up more space, add weight and expense to the bike. But a compression relief system, like any system, can fail and it can fail in at least two different ways: It can fail active and it can fail inactive. In other words, it can fail to relieve pressure when it should or it can get stuck and always relieve pressure, even when it should not. In this case, it looks like the compression relief cam (a spring loaded movable cam surface built into the valve camshaft mounted on top of the cylinder head on each cylinder) is failing to deploy when the engine stops, such that when a start is attempted, IF the engine has stopped right at the start of one cylinder's compression stroke (Reminder: The four strokes of a 4 stroke engine cycle are: Power Stroke, Exhaust Stroke, Intake Stroke, Compression Stroke), then even a perfectly healthy starter motor might not be able to spin the motor. In this engine, the movable cam cracks the exhaust valve open on the Compression Stroke, wasting a little fuel/air mix, but allowing the engine to spin more easily...and therefore faster, to start more easily. Once the engine fires and quickly spins up to idle speed (about 1000 RPM) the cam retracts and full compression is restored, allowing the engine to run at full power. If the cam fails to retract, the fuel waste and reduced compression both conspire to reduce engine power output. So what does this have to do with an electrical failure? Here it is. When the engine is asked to start in a high compression state, the electric starter motor stalls. The starter motor consumes a tremendous amount of current in this condition...over 100 amps. The rider may continue to keep the start button mashed in, or may release it, only to hit it again. The contacts in starter relays are pretty tough, but they are not designed to handle the kind of current flow for more than a fraction of a second. (That current flow drops considerably when the starter motor starts to spin.) Nor are they designed to handle lots of restart attempts in a short period of time. Each start attempt heats the starter relay contacts...and enough start attempts in a short period of time could start to burn the contact surfaces. So the pitted / failed starter relay contacts are not a big surprise at this point. But what about the melted ground wire? As mentioned earlier, the starter motor current does not pass through the wiring harness at all. (See the schematic above.) It leaves the battery, goes through the main lugs of the starter relay, flows through the starter windings, into the bike engine case and frame, and from there, through the main battery wire ground lug, through the battery ground wire and back to the battery. It never goes through the wiring harness at all...BUT...the current that activates the starter relay, that flows through the starter relay windings, that current does go through the harness ground junction...and the starter relay has a big honking winding, that consumes multiple amps of current when it is activated. Bingo. That is where the intermittent high current flow, that eventually fried the overloaded ground wire, was coming from. So...here's the sequence. The spring-loaded, centrifugally released, compression relief cam on the exhaust valve overhead cam lobe (at least occasionally) fails to deploy when the engine stops, making the next start much more difficult. Repeated attempts to start the engine against full compression causes lots of current draw, arcing and pitting of the starter relay contacts, making starts even more difficult...and encouraging the rider to keep the start button engaged for excessively long periods and/or in excessively rapid succession. The high current draw of the active starter relay coil adds to the already excessive current flow through the soon-to-be-fried secondary ground wire as it heads for the secondary harness frame ground lug, because the primary harness frame ground lug is missing...and the wire starts to smoke, creating a general sense of alarm in those around to witness the smoke rising from under the fuel tank. So...what's next? If the fix were free, then determining which of the two camshafts (one on top of each cylinder) has the bad compression relief cam would be next...and it could be fixed or more likely, replaced. However, for the owner, who is not made of money, there is an alternative, at least for now. Live with it. Because the engine does not always stop at exactly the same spot in its cycle, the problematic piston is not always the one that is up to bat. And perhaps the defective mechanism does not get stuck all the time. The fact is that the bike starts just fine somewhere between half and three-quarters of the time. So it falls to the rider to address the problem properly when the problem occurs.
Assuming the failing compression relief system does not get any worse, the owner should be able to operate the bike without too much trouble, saving the near $1000 repair bill that would likely be waiting for him at the end of a camshaft replacement project. Not bad; huh? Now, what about that rusty gas? 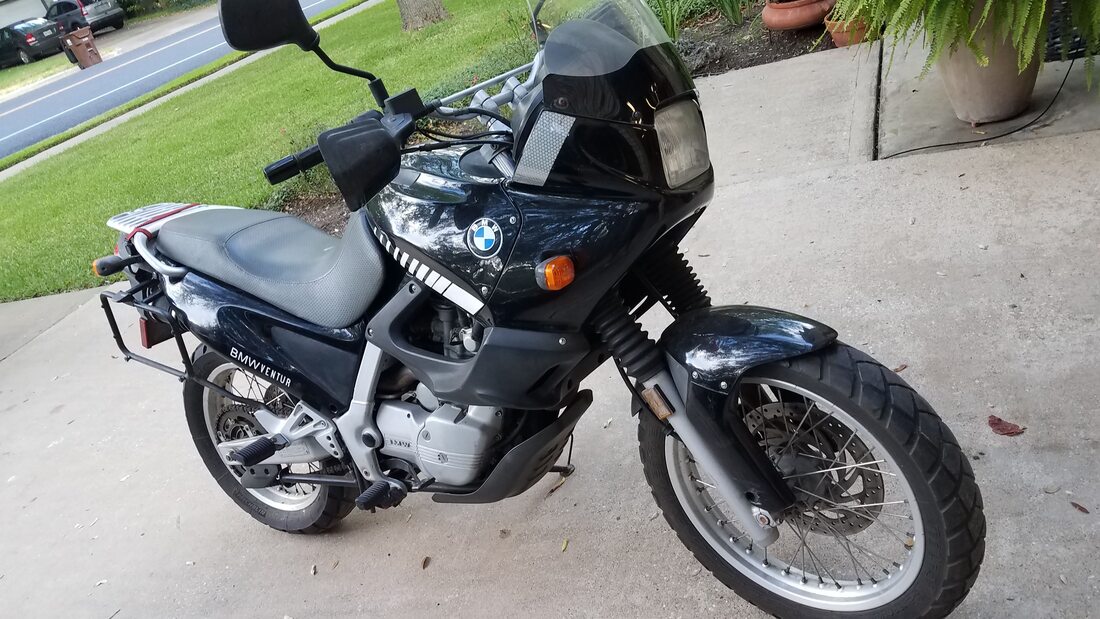 This is a 1997 BMW F650ST, also known as a Funduro. A client had just bought it and brought it in to be made roadworthy again. It had been sitting parked for a few years...and had a few problems...most of which the seller did not disclose. Some were obvious (like, it wouldn't start!). Some only became apparent after it was running again. THE OBVIOUS
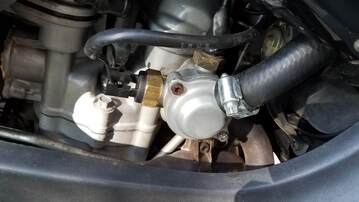 Once the carbs were cleaned, rebuilt and re-installed, the bike got new spark plugs and fresh gas and then fired instantly, (Yay!) Unfortunately, there are some things that just cannot be known until the engine starts running and test rides get underway. THE NEWLY OBVIOUS
The radiator went to a repair shop, which fixed it successfully...full flow, no leaks. Then the thermal switch that controlled the fan was proven dead and was replaced. The radiator cap was replaced just for good measure, a step that was way overdue. The upshot? No more overheating! The battery was still running down. Some quick testing showed that the alternator was producing 3 phase AC voltage (> 50 VAC per phase at 3k RPM), just like it should, when it was unplugged from the rectifier / regulator assembly...and was not when the regulator was plugged in...and the regulator was not producing charging voltage (~14V DC) when the bike was running. So...a clear case of bad regulator. In addition, in the course of troubleshooting the electrical problems, we discovered a couple of spots in the wiring harness (between the alternator and the regulator) that had gotten so hot at some point years ago that insulation was burned off. It was pretty plain that connectors had become corroded and gone ohmic (partially open), resulting in overheated connectors that burned the wires. The bad connectors were cut out of the wiring harness and replaced. We tried a cheap knock-off regulator, but it too failed within minutes of installation. A couple of days later we had a genuine BMW unit installed and the charging system was cured. Like magic, the bike produced 14.4 VDC to the battery @ 3k RPM. Perfect. The previous cursory inspection of the engine oil drain plug had revealed it had been installed with no crush washer, so a leak was no shock. But when a new crush washer failed to stop the drips, it was clear that a closer look was needed...and the sight was appalling. The drain had been manhandled by a neanderthal on multiple occasions. For starters, at some point, someone had screwed the plug in so tight that they cracked to block. (Note: This bike uses a "dry sump" oil circulation system, meaning, it does not have an oil pan on the bottom of the engine. Instead, oil is scavenged off the bottom of the crankcase and pumped into an oil storage tank, from which it is pumped back into the engine. The design is better for off-road bikes that would go into oil starvation if oil were splashing around in a big oil pan when the bike was bouncing around off-road. So...the engine oil drain plug is screwed into the block itself...not into a replaceable oil pan. ) So...yikes! The good news turned out to be that the crack had previously been repaired. Somebody drilled out the case and installed an insert that was tapped for a new plug, which effectively sealed the crack. The bad news was that some other moron had since over-tightened the plug again (without a crush washer) and had chewed chunks out of the mating surface where the washer was supposed to land. There was no way it would ever seal. Well, desperate situations call for desperate measures. Judicious application of fine grit wet/dry sandpaper and a flat sanding block whittled the drain hole outer surface down to flat...at least flat enough for the sealing washer to fill any gaps. It worked. No more drips. 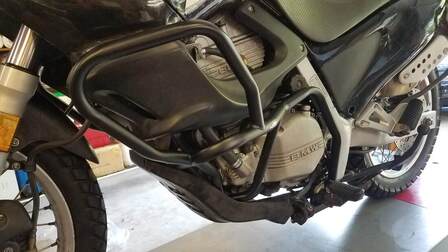 ENHANCEMENT PROJECTS There were just a few more items to cover.
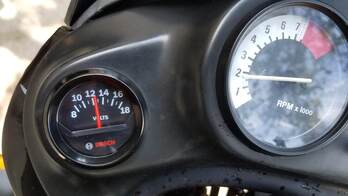 The broken analog clock in the dashboard would have cost a king's ransom to replace. It fits into a standard 2" round meter hole, so swapping in a standard 2 inch $20 DCV panel meter, which is infinitely more useful, was a no-brainer. And the power outlet and phone mount went onto the handlebars with minimal fuss. The outcome? See for yourself. Looks like a pretty happy customer to me. 
I emailed Dave and quickly had a diagnostic appointment in which we talked through some basic troubleshooting and came up with a plan of attack. Dave emailed me over the weekend to let me know he couldn't resist poking around a little, had identified what we needed to work on, and gave me a short list of specific parts to buy (and exactly where to buy them) before our work appointment.
It turns out my issue was largely due to missed maintenance, but Dave took time to explain both how to fix the issue I'd created and take proper steps to avoid it in the future. In addition to best practice maintenance (oil change, cleaning filter, gas storage), I also learned some "basics 2.0" items like spark plug gap spacing, applying the recommended torque when installing a new plug, troubleshooting and draining a carburetor, etc. Not only do I feel a lot more informed and empowered to tackle engine issues in the future, I had a blast hanging out with Dave and learning from him. In addition to being an expert, he's a super easy-going guy and a gifted instructor. I'm lucky to live near WrenchMonster, but it's worth the drive even if you don't. Don't hesitate to reach out to Dave on any engine issues big or small. - Wyn Gregory Austin, TX (Yes, the post title is a dad pun....for which Wyn bears no responsibility. - ed.)
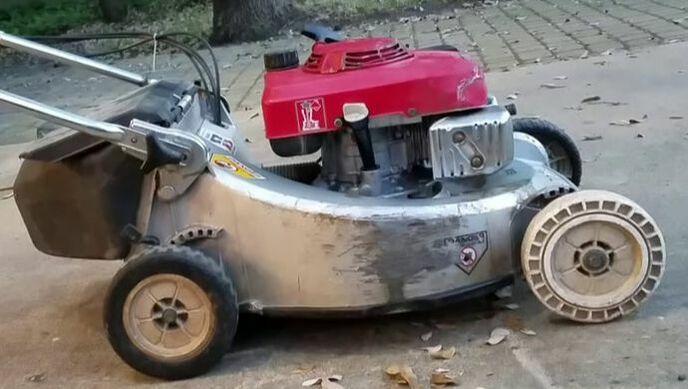
 Disconnecting those items from the engine quickly proved it was the engine that was locked. Bummer. This little Honda may have cut her last blade. With nothing to lose, we pulled the head and took a look. Although covered with tar-like oil, the valve train looked ok. The piston was stuck almost at TDC (Top Dead Center), so we couldn't see the cylinder walls. After applying a big dose of acetone and Automatic Transmission Fluid (the hot ticket for penetrating oil applications), and considerable muscle, the piston broke free and would turn by hand. More oil and more turns revealed no untoward noises and the cylinder walls did not show any scars.
 She blew a little smoke at first but ran like a top!
Next up was the transmission, which was stuck in high gear. After removal from the mower (which requires removing everything connected to the rear wheels) it was disassembled and cleaned. Inspection showed normal wear but nothing broken, so she got a full load of gear oil and went back together with no leaks (to my complete amazement). Back in the mower, with the control cables adjusted to spec, the trans shifted like a dream and the little Honda that almost went to the dump is back home and cutting grass like like a champ. Yes, she smokes a little on start-up...but heck...she's 30 years old. I think that's allowed. 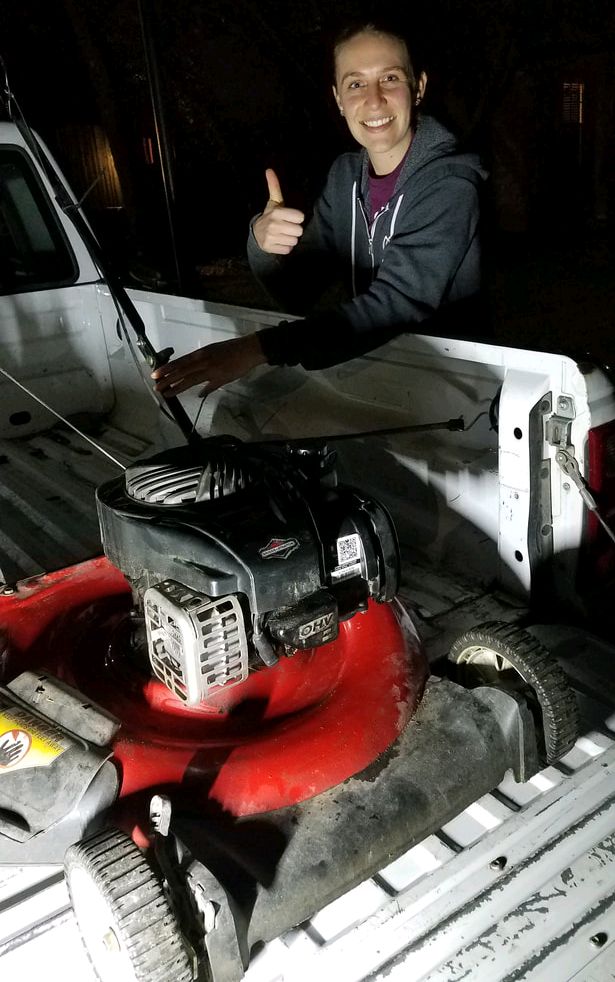 I had a fun and productive session with WrenchMonster getting my lawn mower running again in time for Spring! Learning what to do when "it just won't start" after winter is a game changer. I now know how to best maintain the mower in the winter time and how to tune it up (myself) with new spark plugs and cleaning of the fuel system if it doesn't start up in the future. So cool!
Dave spent half the time teaching the basics of engines and tools we were using and half the time getting hands-on replacing spark plugs, doing oil change, and cleaning the carburetor, etc. After all that, the mower is in working order (yay)! Working with WrenchMonster is such a great value to not only get things fixed and working today, but learn how to do it yourself and not be dependent on a repair shop and service costs in the future. I will definitely return to WrenchMonster with any future projects, and would highly recommend WrenchMonster to anybody who would like to learn to become more self-sufficient to fix and tinker with things - mowers, bicycles, you name it! - Maggie in Austin
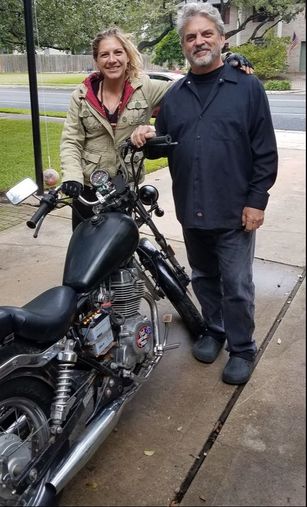 Meeting David was one of the best things that has come off Craigslist! This road angel helped me take my Frankenstein 1985 Honda Rebel and transformed it into an awesome little cruiser. We spent 3 long days tearing apart the parts that hadn't been maintained since conception of the bike, and adding new and updated components. His expertise, know-how, and wide range of tools and parts made the job go by with a lot less headaches than it could have been. Needless to say, I never would have been able to get this bike in the condition he helped put it in. Not only will I refer back to him with future projects, but I will highly recommend his WrenchMonster shop to any and all of my two wheeled aficionados. Upon leaving his helpful hands, I felt exponentially more competent with changing my chain, tuning up the forks, adjusting the brakes, connecting and soldering wired components, and changing out fluids. He was eager to teach, patient to explain, and able to demonstrate tasks I found difficult with ease. I am extremely grateful for WrenchMonster and hope to see this endeavor take off here in the Austin area! To long and beautiful hill country rides! See you on the road. ~Alexis From Texas 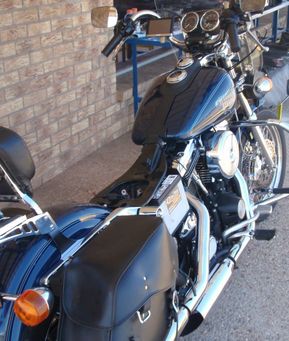 Perhaps you have heard "It only takes a spark to get a fire going...". It turns out that it only takes a spark to kill a bike too. In this case, the spark was the positive post of the battery hitting the frame while the bike was running. Because there is not a fuse between the voltage regulator and the battery, that meant that the regulator shorted to ground with all the current the alternator could produce at that moment (with all the available battery current thrown in just for good measure). The result? The regulator blew...but it blew shorted, not open. Therefore, unregulated alternator voltage was now going straight to the battery and every other electrical component on the bike. You might wonder how this problem looks to the rider. Well, on a simple bike without a voltage or current meter and no electronics to speak of, there are not very many clues anything is wrong...for a while. But it looks pretty interesting in the rear view mirrors of a riding companion a half mile ahead. It looks like the headlight has become an arc welder; really bright...until it goes dark. Then the marker lights can be seen glowing like demon eyes...until they go dark too, burned out from too much voltage, just like the headlight. Fortunately, the bike died before the battery exploded. Naturally, we didn't know at first why the bike died...but the bulbs were all burned out, and a little troubleshooting soon showed the regulator was toast. Still, the question was "Why?". When we noticed a big burned spot on the battery post and one that matched on the frame. Oops. Someone left the battery too loose in its mount the last time it was out. It shifted around enough to make contact. Did I mention the bike died? It didn't restart either. That challenged troubleshooting. To make a long story short, we got very lucky. A local bike shop, normally closed on a Saturday, answered our call and DELIVERED a working (used) regulator...for a reasonable price. (Did I mention we were 3 hours from home, in a little town that could not have been expected to have any bike parts in stock?) With the new regulator installed, the bike started and system voltage came back to normal. Once the headlight, directional and and marker bulbs were replaced, the bike was roadworthy. So that's it. Super bright bulbs...and then they burned out. The alternator produces charging voltage...but it keeps climbing as the engine revs climb...beyond the 13 to 15 volts that is normal for battery charging. Clearly a new regulator was needed...and then we got one and everything was groovy. WrenchMonster diagnostics...that turned the trick. Isn't that cool?  |
Categories
All
Archives
January 2024
|


 RSS Feed
|
© WrenchMonster 2018
|
WrenchMonster™ is a Division of DemonLite, LLC.
|